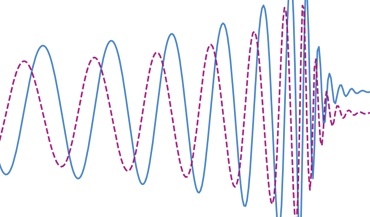
 Gravitational memory and spacetime symmetries
Symmetries of spacetime infinitely far away from gravitational fields may hint at new laws of nature
Timing residuals PSD using Lomb-Scargle method
Tempo2
Libstempo installation
Enterprise installation
[!!!] When following these instructions, find-and-replace "boris.goncharov" with you username on OzStar.
To produce a spectrum (periodogram) of timing residuals we need to use a Lomb-Scargle method, as it deals with unevenly-sampled data. PSD is trivially obtained by dividing a spectrum by a square root of frequencies. There are different ways to do it:
ls_psr = LombScargle(psr.toas().astype('float64')*day, \
    psr.residuals().astype('float64'), \
    dy=psr.toaerrs.astype('float64'),normalization='psd')
psr_f, psr_pow = ls_psr.autopower()
psr_psd = psr_pow/np.sqrt(psr_f)
tempo2 -gr cholSpectra -f pulsar_name.par pulsar_name.tim
MODEL T2
MODEL T2PowerLaw 3.5 2e-25 0.06
Numbers in the second line are parameters of Lorenzian powerlaw: spectral index, amplitude [yr^3] and cornder frequency [year^-1]. They can be inferred by running parameter estimation (Enterprise), or the whole file can be generated by running tempo2's autoSpectralFit plugin.First, we need meet some requirements. Let's install them using HomeBrew.
/usr/bin/ruby -e "$(curl -fsSL https://raw.githubusercontent.com/Homebrew/install/master/install)"
brew install autoconf automake libtoolAfter that follow other instructions below.
brew install gcc@7. The new versions are actually not compatible with pgplot and tempo2. If you are using OzStar, instead of brew you can just load the right versions of gcc and gcccore: module load gcc/7.3.0 gcccore/7.3.0.cp config/profile.example profile.man -k g++ gcc gfortran to see the names of the code. Brew installs gfortran 7 with the executable name "gfortran-7", and similarly for gcc and g++. Check version of all of these executables by e.g. gfortran --version../bin/psrsoft tempo2, and follow the instructions. In case of errors, perhaps the installation still goes on with other gfortran versions. Then, for gfortran, gcc and g++, run in the command line alias gcc="gcc-7"../bin/psrsoft tempo2, but this time choose to install tempo2 plug-ins.export TEMPO2=psrsoft_directory/usr/share/tempo2/ andalias tempo2='psrsoft_directory/usr/bin/tempo2'.Start in your home directory (cd ~):
mkdir tempo2_runtimegit clone https://bitbucket.org/psrsoft/tempo2.gitcd tempo2./bootstrapcp -r T2runtime /home/boris.goncharov/tempo2_runtime/export TEMPO2=/home/boris.goncharov/tempo2_runtime/./configuremake && make installmake plugins && make plugins-installThe pgplot can then be installed separately.
In my case, the tempo2 command is not globally recognized, so I only run tempo2 from tempo2_runtime/bin: ./tempo2
Libstempo requires tempo2 installed. Then follow these steps:
git clone https://github.com/vallis/libstempo.gitcd libstempo
python setup.py install --user --with-tempo2=/home/boris.goncharov/tempo2_runtime/
[!!!] On OzStar whatever is installed with "pip install --user" is not available in Jupyter notebook, that is run with sbatch on localhost. This way libstempo will not be available in Jupyter.
Enterprise requires tempo2 and libstempo installed. It requires an MCMC sampler, i.e. PTMCMCSampler. I think installing this sampler crashed my enterprise because it installed other version of numpy. Uninstalling numpy, and making sure numpy 1.14.0 is installed, helped. Then follow these steps:
cd ~pip install --user numpygit clone https://github.com/nanograv/enterprise.gitcd enterprisepip install -r requirements.txtvim ~/enterprise/requirements.txtpip install --user ***requirement_module_name***python setup.py install --usercd /home/boris.goncharov/tempo2_runtimecp -r T2runtime share/tempo2. Gravitational memory and spacetime symmetries
Symmetries of spacetime infinitely far away from gravitational fields may hint at new laws of nature
 The nanohertz gravitational wave background
Is the common-spectrum process observed with pulsar timing arrays a precursor to the detection?