 Gravitational memory and spacetime symmetries
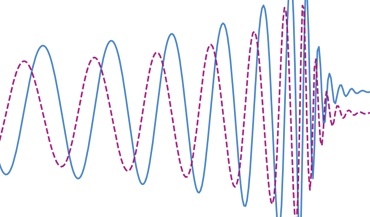
Symmetries of spacetime infinitely far away from gravitational fields may hint at new laws of nature
Sometimes it is necessary to run the code on different machines, but it usually requires moving all of the dependant code as well, and dealing with various compatibility issues. Apptainer (former name: singularity) allows to create virtual machines with pre-installed code, and to easily deploy it on other machines where apptainer is installed. On this page, I leave notes on how to create such containers.
Before following these instructions, create and enter a new directory where the virtual machine files will be stored. I will refer to this folder as /apptainer_directory/.
For MacOS users, apptainer will not run natively. It requires yet another virtual machine to work with it. See installation instructions in the Apptainer documentation. It is first necessary to install Lima or Vagrant. Users of Unix/Linux-based OS can skip this step.
For M1 processors (arm64 architecture), the container has to be built under the same architecture in order to work on it. So, containers built on a MacBook with M1 will work on other MacBooks, but not on arbitrary computers with Intel/AMD chips, and vice versa.
Lima is installed by running brew install qemu lima (Homebrew is required for this). Next, Lima container is created by limactl start template://apptainer. Note, you can replace the last part with a .yaml file that contains settings for Lima. Current settings allow running apptainer inside Lima. To enter the virtual machine, run imactl shell apptainer. To exit, type exit.
One caveat is that Lima may run out of disk space at the next step if too many programs are put into the container. This happened to me. I resolved this by stopping a Lima instance and creating a new one where instead of template://apptainer I added lima_apptainer_custom.yaml. The yaml file is a copy of the apptainer.yaml file on Lima GitHub in examples, where I also added the following to increase memory limits:
disk: "200GiB"
memory: "8GiB"
cpus: 4
The list of existing Lima instances can be found with limactl list. Lima instance can be stopped with limactl stop name_of_lima_instance.
Vagrant is installed by brew install --cask virtualbox vagrant vagrant-manager (also, Homebrew is required). Next. run vagrant up and vagrant ssh to enter the virtual machine.
Note, I did not use Vagrant because Apptainer needs to be separately installed in Vagrant VM.
Next, let us choose apptainer settings, outside of Lima/Vagrant. So, if you are in Lima, exit it. Create a file with extension .def in the /apptainer_directory/, with the following content. I will refer to it as name_of_def_file.def. It is based on Miniconda and Python 3.9.
Bootstrap: docker
From: debian:9

%help
    Container with Miniconda

%environment
    # Custom environment variables
    # E.g., export LAL_DATA_PATH=/

%setup
    #Create the .condarc file where the environments/channels from conda are specified, these are pulled with preference to root
    cd /
    touch .condarc

%post
    apt-get update && apt-get -y upgrade
    apt-get -y install \
    build-essential \
    wget \
    bzip2 \
    ca-certificates \
    libglib2.0-0 \
    libxext6 \
    libsm6 \
    libxrender1 \
    git
    rm -rf /var/lib/apt/lists/*
    apt-get clean
    #Installing Miniconda
    wget -c https://repo.anaconda.com/miniconda/Miniconda3-py39_23.1.0-1-Linux-x86_64.sh
    /bin/bash Miniconda3-py39_23.1.0-1-Linux-x86_64.sh -bfp /usr/local
    #Conda configuration of channels from .condarc file
    conda config --file /.condarc --add channels defaults
    conda config --file /.condarc --add channels conda-forge
    conda update conda
    # Custom conda packages can be added here
    # E.g., conda install -c conda-forge matplotlib
    # Or custom conda environments can be created
    # To free some space:
    conda clean --tarballs --yes
Note, Python packages can be installed in addition to the above when the Apptainer container is deployed somewhere. It will be shown later on. However, I am not sure if one can install programs that require root access when deploying the container.
Now, let's create an apptainer (singularity) container. Enter Lima/Vagrant if you are on MacOS. In my case it is Lima, but for Vagrant the procedures will be similar.
Go to a directory with a write access as specified in the .yaml file. Currently, it is cd /tmp/lima/. Then run a command to build a container: sudo apptainer build container_name.sif /apptainer_directory/name_of_def_file.def. Note, /apptainer_directory/ path is automatically created inside the Lima machine, the same path as on your real machine. And it contains the definition file we created. Note, I also got a "FATAL" error at the end of the building process related to "chown" command, it does not seem to be a problem because the necessary container .sif file is created at this point.
On MacOS, if the commands runs successfully, you can exit Lima and run limactl copy apptainer:/home/lima.linux/container_name.sif /apptainer_directory/container_name.sif. If you created Lima instance with a custom yaml file, you need to replace apptainer with lima_apptainer_custom. After this command, the newly created container will be copied from Lima to your actual machine, in the folder /apptainer_directory/. If you are on Linux/Unix, the container will already be there pr in your home directory.
First, decide which directory on your machine the container will see, and can read from and write to. For example, we created a directory /sandbox_folder/.
To enter the container, run: singularity shell --bind "/sandbox_folder/:$HOME" EPTA_ENTERPRISE.sif. This way, you will enter the container, and the home directory inside the container will be associated with the sandbox directory on your physical machine.
To run a certain Python command with the container, run singularity exec --bind "/sandbox_folder/:$HOME" /apptainer_directory/container_name.sif python3 ..., where three dots is where you add a path to the python script in the Apptainer image, or the python command.
To install a python package within the container, git clone the repository, go to the repository, then run python -m pip install --user .. Note, python setup.py install did not work, it was completed but the package was not visible.
Gravitational memory and spacetime symmetries
Symmetries of spacetime infinitely far away from gravitational fields may hint at new laws of nature
 The nanohertz gravitational wave background
Is the common-spectrum process observed with pulsar timing arrays a precursor to the detection?